
Sing in to continue to Google Cloud Platform
Go to https://console.cloud.google.com and sing in to enter the Google Cloud console.
Click the project button in the top menu and you'll see the Select a project pop-up. Click the NEW PROJECT button create a project.

Enter the Project name and click the CREATE button.

Once a project is created, go to . Select Credentials from the left-side menu then click the CONFIGURE CONSENT SCREEN button.


Choose the External in the User Type options, then click the CREATE button.


You'll be on the step Scopes. Click the ADD OR REMOVE SCOPES button to select the scopes. Select three required API Scopes:
Once selected click on the UPDATE button.

The selected scopes will now appear on the Your non-sensitive scopes section.
Continue to the next step by clicking on the SAVE AND CONTINUE button.

You'll be on the step Summary that shows you the outline of your app registration. Click the BACK TO DASHBOARD button.

Select Credentials from the left-side menu. Click the CREATE CREDENTIALS button and select the OAuth client ID item.

Once clicked, it'll take you to the Create OAuth client ID page
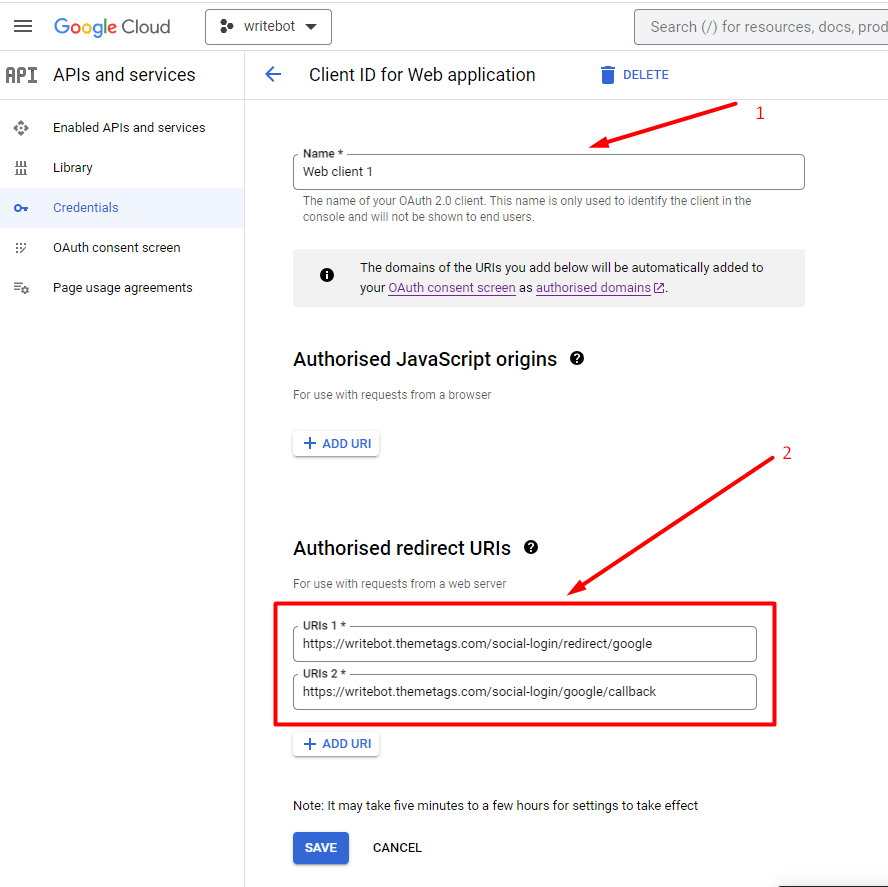
Select the Web application option in the Application type . Enter a name of your OAuth 2.0 client in the Name field.
Enter allowed redirect URLs in the Authorized redirect URIs section.
Click the CREATE button

Once you click the button, the OAuth client created pop-up will appear or you can see like this images of and you'll see your application keys.

Now got to writerap admin panel System setting Social media setting, Then input the Google Client ID and Google Client Secret id.
